React Native Launchpad is an opinionated, batteries included template for building scalable testable apps.
The guiding principles for this template are as follows:
- Logic should be as easy to test as it is to develop
- React should empower the native, not try to abstract it away
- Avoid writing logic in hooks, write them in classes, use DI when necessary to provide access to that logic to the needed viewmodels.
- Avoid external third party dependencies that are not pure JS when reasonable. Write what you need in terms of native code instead so updates are painless
The general architecture of this template and how it is supposed to be used can be best described as follows:
- Libs: Atomic pieces of logic, say your currency formatter, your analytics implementation, your network interceptors, etc
- Repos: Domain logic. This is where the bulk of your app's logic exists. Each repo is in charge of a specific domain, like your user repo, your initialization repo, your in-app purchase repo, etc. Stuff like caching should be handled here
- Views: The UI logic for each screen, built from the data coming from the repos
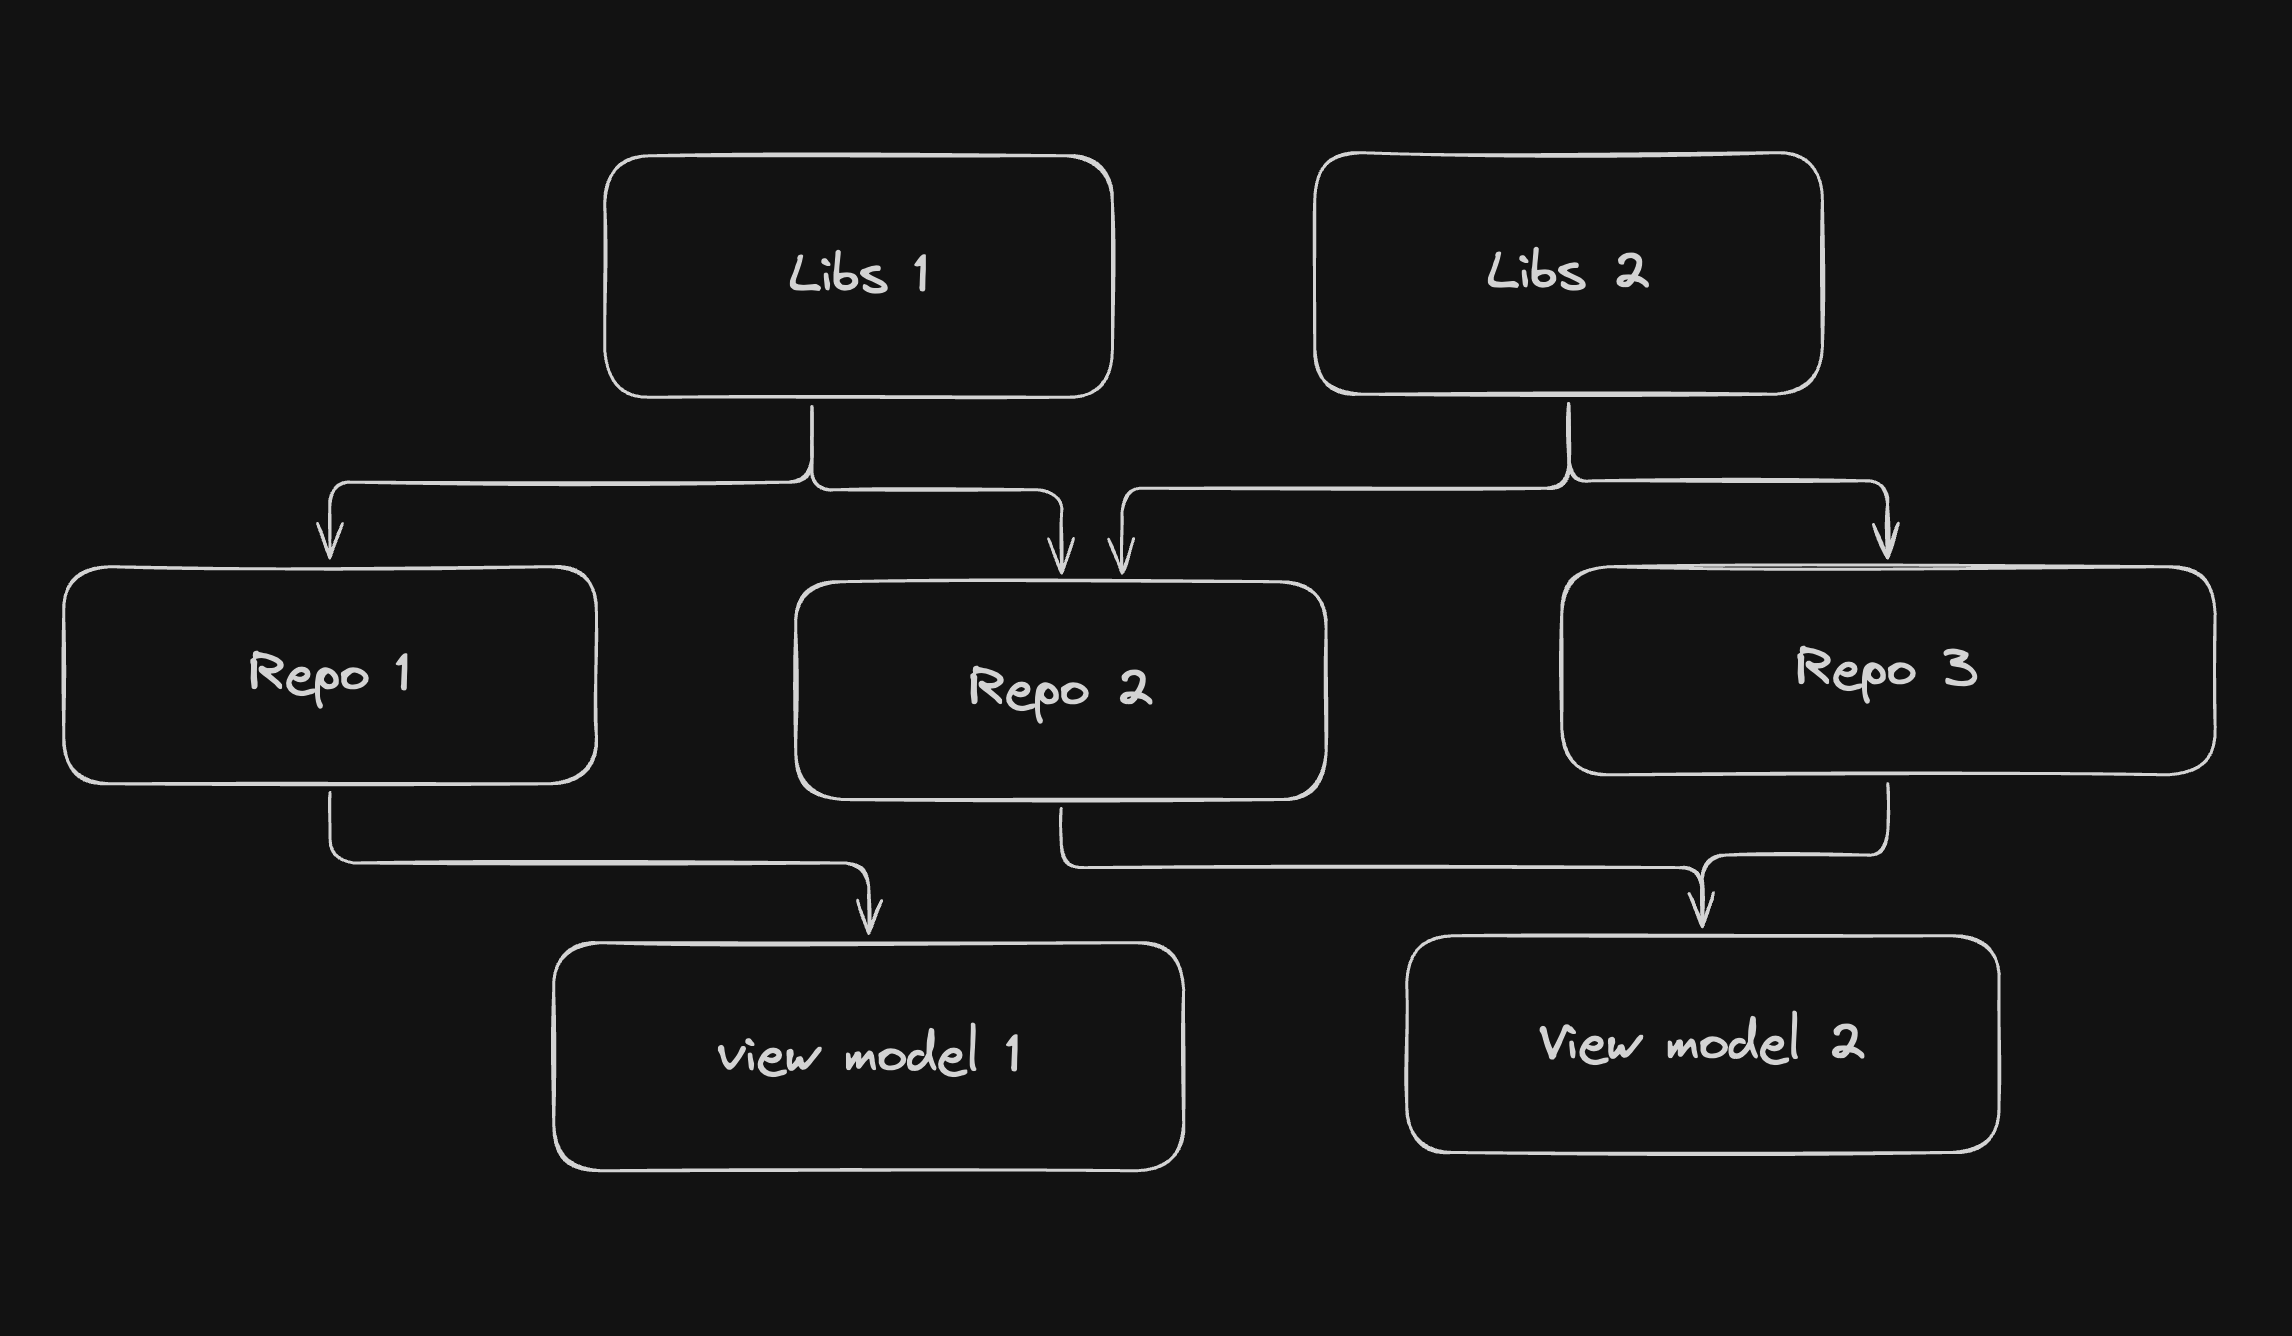
Important to note: Layers can not have horizontal dependencies. Libs can not depend on each other, repos can not rely on each other, and view models can not rely on each other. Otherwise we will have cyclical dependencies
For communication between the different layers, we use a lightweight custom DI container (launchpad-dependency-injection) as a service discovery layer.
Each module registers itself with the container in the same file where it's implemented. Repos and Libs are singletons (shared across the app), while ViewModels are transient (new instance per use).
The registration pattern looks like this:
@singleton()
export class TicketRepoImpl implements TicketRepo {
  constructor(dependency?: Dependency) {
    this.dependency = dependency ?? get(dependencySI);
  }
}

export const ticketRepoSI = createToken<TicketRepo>('ticketRepo');
container.register(ticketRepoSI, TicketRepoImpl);
This pattern makes testing easy - just pass mocks directly to constructors. In production, the DI container resolves dependencies automatically.
Note: Make sure you have completed the Set Up Your Environment and the Detox setup prerequisites guide before proceeding.
Before starting development, you should rename the template from "AwesomeProject" to your own project name.
Run the rename script from the root of your project:
./scripts/rename_template.shThe script will prompt you for:
- New project name (required): The name for your project (e.g.,
MyApp) - iOS bundle identifier (optional): Custom iOS bundle ID (e.g.,
com.yourcompany.MyApp) - Android bundle identifier (optional): Custom Android package name (e.g.,
com.yourcompany.myapp)
If you don't provide custom bundle identifiers, the script will use sensible defaults based on your project name.
After running the script, remember to:
- Install iOS CocoaPods dependencies:
yarn ios:pods - Clean build folders if needed:
- iOS:
cd ios && xcodebuild clean - Android:
cd android && ./gradlew clean
- iOS:
- Delete the scripts folder as it is no longer needed
First, you will need to run Metro, the JavaScript build tool for React Native.
To start the Metro dev server, run the following command from the root of your React Native project:
# Using npm
npm start

# OR using Yarn
yarn startWith Metro running, open a new terminal window/pane from the root of your React Native project, and use one of the following commands to build and run your Android or iOS app:
# Using npm
npm run android

# OR using Yarn
yarn androidFor iOS, remember to install CocoaPods dependencies (this only needs to be run on first clone or after updating native deps).
The first time you create a new project, run the Ruby bundler to install CocoaPods itself:
bundle installThen, and every time you update your native dependencies, run:
yarn ios:podsFor more information, please visit CocoaPods Getting Started guide.
# Using npm
npm run ios

# OR using Yarn
yarn ios
If everything is set up correctly, you should see your new app running in the Android Emulator, iOS Simulator, or your connected device.
This is one way to run your app — you can also build it directly from Android Studio or Xcode.
Now that you have successfully run the app, let's make changes!
Open App.tsx in your text editor of choice and make some changes. When you save, your app will automatically update and reflect these changes — this is powered by Fast Refresh.
When you want to forcefully reload, for example to reset the state of your app, you can perform a full reload:
- Android: Press the R key twice or select "Reload" from the Dev Menu, accessed via Ctrl + M (Windows/Linux) or Cmd ⌘ + M (macOS).
- iOS: Press R in iOS Simulator.
Depending on if you want to add native views (Say Webview, Lottie) or native modules (Bluetooth, SQL) you can go inside the native-views or the native-modules directories and define your interface in TypeScript.
You can then run
npx nitrogenin that directory and it will generate the respective Kotlin and Swift interfaces, that you can then use to develop your logic
For more instructions on native module setup read:
- Views: https://nitro.margelo.com/docs/view-components
- Modules: https://nitro.margelo.com/docs/how-to-build-a-nitro-module
IMPORTANT TO NOTE: Any native module/view that you create, you will also need to create a mock for as well in jest.
You can do it locally per the tests that need your native module, or you can use the global ones provided under setup-jest.js if you don't care about their output
This template is already setup with examples and all the necessary bits out of the box to have Unit testing working
Simply add your test under __tests__ folder and run:
yarn test:unitto validate them
In order to run E2E tests, we first need to make one off builds. Both release and debug mode have been configured, however in the scripts we will only include cases for debug to not assume your release and archiving process
First, add your new test under e2e directory
Then, for iOS, first run:
yarn test:e2e:build:iosto build the app, and with metro running (yarn start), you can now run the following command:
yarn test:e2e:run:iosFor android, the commands for building and running are:
yarn test:e2e:build:androidand
yarn test:e2e:run:androidrespectively.
This template is powered by tools that the community already uses, such as:
- React native community CLI for the bare workflow
- Launchpad Dependency Injection - lightweight DI system
- MobX for view models reactivity
- React Navigation for the navigation and deep linking systems
- Nitro modules for native views and native modules
- Zod for runtime schema validation
- Jest for unit testing
- Detox for E2E testing
To learn more about React Native, take a look at the following resources:
- React Native Website - learn more about React Native.
- Getting Started - an overview of React Native and how setup your environment.
- Learn the Basics - a guided tour of the React Native basics.
- Blog - read the latest official React Native Blog posts.
@facebook/react-native- the Open Source; GitHub repository for React Native.